Friday, July 31, 2009

Soft Taco Night...

So, my husband was craving some tacos, and since we had just bought some tortillas, he apparently felt the need to use them all up right away... I actually wanted them to make some quesadillas for my son. But, instead I ended up making some delicious soft tacos for dinner! I usually use a packet of taco seasoning, but I didn't have any, and I also didn't feel like going back to the grocery store in a hot car just for a small packet of seasoning. So, I made up my own "taco seasoning" and it tasted pretty good with the ground beef. It was a little bit spicy, but still yummy! :) When you have the beef mixture made, you can add any toppings you want. We had some tomatoes, green chili and shredded cheddar on hand. I also like sour cream, but we didn't have any. The beef mixture can be used in any kind of tortilla you want. Since we just had flour tortillas, we made soft tacos. But you can certainly use corn tortilla taco or tostada shells, or make your own corn tortilla tacos if you have a deep fryer. Yum! :) Enjoy!

Ingredients for beef mixture:

1 tbsp olive oil
1 lb ground beef
1 green bell pepper, diced
1/2 onion, diced
1 tbsp garlic, minced

Ingredients for taco seasoning:

2-1/2 tsp onion powder
2 tsp New Mexican chili powder
1 tsp salt
1/2 tsp pepper
1 tsp garlic powder
1 tsp cumin
1/2 tsp red pepper flake


In a small bowl, stir together all taco seasoning ingredients until combined. Set aside. In a large skillet, heat oil over medium-high heat. Add onion, garlic and bell pepper and cook until tender. Add beef and combine with the other ingredients while browning. When beef is browned, add taco seasoning mixture. You can add as much or as little as you want until it is to your preferred taste. Mix all ingredients well. Serve in a warm flour tortilla or a crunchy corn tortilla with your favorite toppings. :)


Share/Save/Bookmark

Thursday, July 30, 2009

Alphabet Bean Bags

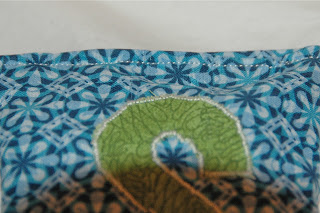
I made these alphabet bean bags for my son, and they were actually pretty easy to make. The hardest part for me was sewing on all the letters... 'G' and 'Q' are probably the hardest. But, I think they still turned out okay. We'll use these for sorting different things that start with each letter, spelling things out, or just tossing them around and having fun! :) Here's how to make them:

First, you'll need two square pieces of fabric for each bean bag. I didn't measure my squares. I thought, since they're bean bags they didn't have to be perfect, and I wasn't worried about whether or not they were each the same size bean bag... Use a different color fabric to cut out the letter, then sew it on one piece of fabric using the small zigzag stitch. If you want, you could also do a lowercase letter on the other piece of fabric, then you would have an uppercase letter on one side and a lowercase letter on the other. 

Next, you'll need some type of "pouch" to hold the beans on the inside of the bag. You can make any type of fabric pouch using scrap fabric, or anything you have on hand. Since no one will see the inside of the bag, I used some old, but clean socks. I just cut off the toe/foot part and the above the ankle part, and discarded the heel part. For the toe/foot section, I just filled it up with beans, then sewed the other end closed. For the above the ankle part, I sewed one end, then filled it up with beans, then sewed the other end closed. I tried a few different "fillings" for my bean bags... rice, lentils, tiny pasta, and Israeli couscous (pretty much anything I had in the pantry). I like the way the Israeli couscous sounds/feels best, but you can use whatever you like. :)

After you've made your bean pouches, sew the two pieces of fabric together, right sides facing each other. Only sew three sides of the square, leaving one side open for "stuffing". 

Turn the bag right side out, then stuff with the bean pouch. 

Fold in the edges of the fabric, and pin together to prepare for sewing the final side. 

Sew the last side across... 
Then you've made a bean bag! :)

Repeat for 25 more letters... Then breathe a sigh of relief when finally done! ;)

Yay! Now it's learning time!
Have fun!


Share/Save/Bookmark

Tuesday, July 28, 2009

Tot School

Tot School
Last week was my son's first week of Tot School, but I'm sure we've essentially been doing some of it a little longer. If you haven't heard of Tot School, check out the website here, or click on the button above. They have some really great ideas!

Here are some of the things we did this week... 

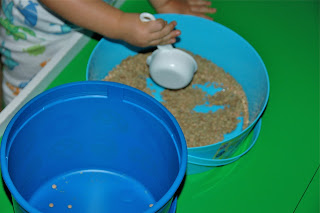
Finding hidden "treasures" in a bucket of beans... 
He liked the way the beans felt on his hands!


So, then we tried scooping and pouring... 

It was much easier for him to use his hands... 
Good thing he loves to help Mama vacuum! :)

We also did a little bit with the letter "A"... 
I made a simple book for him 
with pictures of "A" things... including relatives! :)

He loves trying to find things, and pointing to them! :)

Then we played with 'A'nimals... Here he is finding the pig. 

I think this is my favorite! In case you can't tell, 
that's a shark eating a giraffe... ;)

We also played some "fill and spill" with a plastic bottle and pipe cleaners. 

He also liked destroying the bottle... 

We had a fun time learning! :)


Share/Save/Bookmark

Monday, July 27, 2009

Muffin Tin Monday

This is my first time participating in Muffin Tin Monday. When I saw the idea at Her Cup Overfloweth, I thought it was so cute! And what a great way to mix things up and add some extra variety for a picky eater... like my son (occasionally). Anyways, since this week there is no theme, I thought this Monday would be the perfect day to start! So, I gave my son a mix of four different things in my 6-cup muffin tin. I think next time I'll use all 6 cups to give him even more variety...  In this muffin tin, I put some strawberries, bite-sized chicken-apple sausage, cut up string cheese, and Banana Nut Cheerios. Excuse the shabby muffin tin... it's been used. If you've been following my blog, you know that I love making muffins, so I definitely make good use of all my muffin tins! :)

Well, this was one of my son's "picky" weeks, so... much to my dismay he wouldn't touch the sausage or the cheese (big sigh...). But of course, he loved the Cheerios and the strawberries! Hmmm.... I wonder why...  Anyways, like I said, I will keep trying, and maybe we will be a little more successful next time. I still think this is a super cute idea and it is great to make things a little different for meal time. I think my son really liked picking the food out of the little cups. :)


Share/Save/Bookmark

Friday, July 24, 2009

Celebrating My 100th Post With a Giveaway!

It's official! Today is my 100th blog post! Mama Mel Loves... has been around since April and I've already posted 100 times! I can't believe that happened so fast! I love blogging about all of my crazy ideas, but most of all, I love meeting some really amazing new people through my blog and through visiting other blogs! The blog world is so awesome! :) 

So, to celebrate I'm having my first giveaway! Since I've never done this before, I thought I'd start simple by giving away a sock monkey in a cute argyle "sweater", handmade by yours truly... along with a $10 Target giftcard! 

So, here's what you have to do:

1. Comment on this post and tell me why you would like to adopt Mr. Monkey. :)

For Extra Credit you can do any or all of the following. Please leave a separate comment for each extra thing you do:

2. Follow me

3. Subscribe via Email

4. Follow me on Facebook and tell your Facebook friends about this giveaway

5. Follow me on Twitter and Tweet about this giveaway with a link to this post

6. Post this giveaway on your blog with a link to this post

Each extra credit item gives you an extra entry into the giveaway. But, be sure to place a comment about each extra thing you do. Also, please leave your email address in at least one of your comments so I can get in touch with you if you happen to be the lucky winner! :) I will be choosing the winner on Monday, August 3rd, using Random.org. 

Good luck! :)


Share/Save/Bookmark

My Backyard Herbs

I am posting a picture of some of my herbs to enter into Squirrel Queen's Farmer's Market Challenge this weekend. Check her site out and enter your photos of your local Farmer's Market or your backyard garden.

I am growing some tomatoes and bell peppers in my backyard planter too and I was hoping to have some of them in this pic too, but they weren't quite ready yet.  However, my herbs are growing like crazy! I have a bunch of basil, sage, rosemary and thyme, and I love using them in my cooking. The best part is, I can just walk outside, snip some fresh herbs, rinse them, then start chopping! I just LOVE the smell of fresh herbs!

I put my herbs in little brown bags and my mini shopping cart to make it look like I was doing some serious "shopping" in my backyard. ;) 


Share/Save/Bookmark

Thursday, July 23, 2009

Mac and Peas

I was having a really rough time this past week... trying to get my son to eat anything nutritious! I don't know why this happens. He has some really great weeks of eating "normal", and I think, "maybe he's changed and he's going to be a good eater from now on"... But then we have frustrating weeks like this past one where he turns down almost anything I make for him. It is frustrating, and I have no idea where he gets it from... my husband and I are both good eaters! Anyways, this week it seemed my son would only eat anything "bread" related... crescent rolls, crackers, pasta... So, I've had to be really creative this week. I made this new Mac and Cheese where I snuck in extra protein and veggies (I can't believe I'm having to resort to sneakiness!). I mixed in some tofu with the cheese sauce, then added sweet potato puree and peas. It was very successful! I tried some too... and it was delicious! This is going to be one of my new "go-to" recipes when my son is feeling picky again! Enjoy! :)

Ingredients:

2 cups small pasta (I used elbows)
1/4 cup tofu (I use firm since it has more protein)
1/2 cup milk
1-1/2 cups shredded sharp cheddar cheese
1/4 cup sweet potato puree
1/4 cup frozen peas
Dash of pepper

Cook pasta per package directions.
In a food processor or blender, puree together tofu with 1/2 cup milk until smooth. Heat tofu mixture over medium heat until warm. Slowly whisk in cheese until melted evenly, and mixture becomes smooth. Reduce heat to low. Add sweet potato puree and stir until combined. Add pasta and frozen peas. Stir until evenly coated with cheese sauce, and peas are cooked (this only takes a minute or two). Add pepper to taste. Serve and enjoy!


Share/Save/Bookmark

Wednesday, July 22, 2009

Baby Blanket

I don't know why I have never posted this... I guess I just forgot about it since my son sleeps with this blanket all the time! Anyways, this is the baby blanket I crocheted for my son before he was born. I had never crocheted anything before I made this, so it was my first attempt, and I think it turned out pretty good! :) I was trying to do the colors the same as we had in the room... yellow, green, and white. The green isn't exactly the same, but I thought it was close enough... plus I wanted the same type of yarn for all the colors. I think I remember my grandma showing me how to crochet one time when I was staying at her house... but by the time I was pregnant, I had long forgotten how to do it... so, I resorted to the following books:

I liked the pictures in these top two books. They really helped me to understand what I needed to do. They also have some patterns you can follow if you're more experienced/brave. ;) Since I was too scared to try anything super fancy, I just did a single crochet throughout the entire blanket, then switched colors every 8 rows. 

I also liked this baby afghan book for the cute patterns. I'm currently starting a blanket for my niece for Christmas. I'm hoping to make some type of blanket for all of my nieces and nephew eventually. :) I just LOVE making gifts! 


Share/Save/Bookmark

Tuesday, July 21, 2009

Library Books

We've been going to the library a lot more this summer! There's a fairly new one near our house that opened up last November, and we've already visited a few times. I love it! I am very happy to say that my son LOVES to read! We have a bookshelf in the family room where he is free to pick out books for us to read to him... and he does this quite often throughout the day. I always set aside quiet time before bed and read him at least five or six books. Needless to say, we have TONS of books! There are so many cute ones that I just knew I had to get for him, and our "home library" just keeps getting bigger, much to my husband's dismay (I, however, love having lots of books!). Since money is getting tighter, we've decided to utilize our local library more. So, we've been checking out a few books for our son about every 1 to 2 weeks. Then I get to see which ones he really likes, and I add them to his "book wishlist". Then, I'll hint to family members to get him something from his wishlist for his birthday or Christmas. ;) Since he's only 20 months old, I get to make the selection at the library. I usually know what he will enjoy. Right now, we typically only allow board books, since he's pretty rough on anything with paper... ;) 

Here's our selection from this past week: Colors Everywhere and When I'm Big by Sam McBratney (the author of Guess How Much I Love You), Teeth Are Not for Biting by Elizabeth Verdick, Blankie by Leslie Patricelli, and Uh-oh, Calico! by Karma Wilson. 

So, wanna guess which ones he likes? 

Yeah... the ones with all the colors in them... not the cutesy pastel-colored ones that Mama likes... Oh, well! I do have to admit, the super colorful ones still have cute stories too. My son really likes the pictures in Blankie, and he loves the rhyming and saying "Uh-oh", when I read Uh-oh, Calico! And it seems like he's really paying attention when I'm reading Teeth Are Not for Biting... anyways, I hope he is. He sits very quietly and listens. :) He's not really a biter, except for when I try to help him brush his teeth... He's getting so independent! But, sometimes he just brushes one side of his mouth, and I want to make sure he gets all his teeth! Anyways, no recent bites... so maybe the book is sinking in! :) I do love all of the "Best Behavior" series books by Elizabeth Verdick, and I'm hoping to add them all to his collection... eventually. As for the other two books... I really like them. They are both super cute stories... just what you'd expect from Sam McBratney. Maybe my son will like them more when he's a little older... 


Share/Save/Bookmark

Monday, July 20, 2009

Sock Penguin

Can you believe it?! I think I'm going crazy making all these sock toys for my son... But, I just can't seem to help it... I get these ideas in my head and I think, "Oooh! I can make this animal next!" So, here's my newest animal... Sock penguin. I didn't use a book or a pattern or anything. Just my silly imaginative brain... And, the good news about the penguin is that he only required one sock! However, I did use some pieces of felt for his tummy, beak and feet, and the fish... I am trying to make these animals look a little bit less pathetic, but I am still new at this, so I'm sure they will get better in time. :) 

So, it seems that penguins are my son's favorite animal thus far... Here's how it happened: I was at the store with my mom one day when my son was about 6 months old, and there was a display of all these cute little stuffed animals, Webkinz I think. I thought he might like the polar bear or the rooster, but he was very interested in the penguin, probably since it was black and white. So, I bought the penguin for him. Now he can't sleep without it. It's his "security blanket". So, in case something happens to that penguin, I bought another one that I keep in a drawer, so hopefully he'll never be without his favorite penguin. Anyways, I thought I'd make him a special penguin too. He doesn't like the sock penguin nearly as much as the store-bought one, but he still plays with it a little bit... It was my husband's idea to add the fish. He always has an opinion on anything I make. :) I think it's cute that he wants to be involved. 

Anyways, enjoy! 


Share/Save/Bookmark

Sunday, July 19, 2009

First Art Re-post

This is my son's first experience with painting. I think it is the most beautiful painting I have ever seen! So colorful! Maybe I'm a little biased... ;) We put him in a 5 week art class this summer, and he is loving it! I am entering this painting in a contest at Toddler Craft
Wish me luck! 

Ok, so I entered my son's lovely masterpiece in this contest, and now everyone can vote on it if you head on over to Toddler Craft. You have until 5pm Eastern Time today to vote. The winners will be announced tomorrow! His picture is under "Mama Mel". Any votes for him would be much appreciated with lots of comment love! :) Thank you! 


Share/Save/Bookmark

Saturday, July 18, 2009

Cranberry-Orange Pancakes

More Pancakes... yum! I need to get even more creative and start making some delicious syrups to go along with all these different pancake recipes! 
As I said in my mini-cranberry corn muffin post, I have been in the mood for cranberries lately. I think it is mostly because I cannot wait for fall... as usual! It is my favorite time of year with all the different colors and foods... I am already excited for Thanksgiving! 
Cranberries are usually around in the fall and winter, but you can probably find some frozen cranberries in your supermarket. I used frozen for this recipe since fresh were not available... I love orange and cranberry together! These two flavors are like butter and popcorn... they just go together! :) So, I thought some yummy cranberry-orange pancakes would be a delicious morning breakfast! As usual, my son gobbled them down... even though they weren't very sweet! :) Enjoy!

Ingredients:
3/4 cup Arrowhead Mills Multigrain Pancake Mix
1 tbsp Canola oil
1/2 cup plus 2 tbsp milk
2 tbsp orange juice*
1/2 tsp cinnamon
1 tsp agave nectar
1 tbsp flaxseed meal
1/2 cup fresh or frozen cranberries, thawed, rinsed, and chopped*

Heat a nonstick skillet or griddle over medium-high heat and coat with nonstick spray. In a medium bowl, combine all ingredients except cranberries. Stir well until moistened and smooth. Gently fold in cranberries until evenly distributed throughout the batter. Pour batter into round circles on skillet, and cook until bubbles begin to form on the top and edges begin to firm up. Flip and cook for another 1-2 minutes. Serve plain or with hot maple syrup! 

*Note: If you have fresh oranges on hand, you can use fresh squeezed orange juice and some orange zest for more orangey flavor and fragrance! I chopped the cranberries since I was serving these to my toddler son. I figured the whole cranberries would be a little too big for him. You are more than welcome to use whole cranberries if you desire! Dried cranberries would probably be fine in this recipe too! :)


Share/Save/Bookmark

Friday, July 17, 2009

Have patience...

Hey everyone! I just wanted to give you a heads up... I will be changing my blog around to make it look a little prettier. Bear with me as I try to "clean house" a little. I am hoping this will work out so that I will feel a little better each time I look at my blog page... and hopefully you will too! :) Thanks! 
Share/Save/Bookmark

Peek-A-Boo Sock Toy

This may be the easiest "toy" I've ever made for my son! I wish I had come up with this idea on my own. But, I got the idea when we were at his Art Class Thursday morning. The teacher had a bunch of socks with cups in them, and the cups had a small toy or object inside! I thought this was such a good idea, I knew I had to make my own and post it on the blog! My son loves trying to find things, and he especially loves taking things out and putting them back in... So, I knew this would be a perfect, easy, and inexpensive "toy" to make for him. I made about 8 toys in less than 5 minutes with things I already had on hand! And, it is something simple that he loves playing with! It's so cute to watch him stick his little arm in the sock to find the "treasure" inside! :)

What you'll need: 
Old but clean socks
Paper or plastic cups
Small toys/objects

Above are some examples of things I put in my sock cups. Small horse toy, Cookie Monster, plastic spoon, ball, mini-noise maker, wood toy, small stuffed animal, block, car. The teacher also had a wood ring, plastic string of beads, among other things... Anything small would work, just make them all different for more of a "surprise" element. :)

Then your child can reach in and grab the toy (yeah... that's my hand above. My son was taking a nap at the time...). We played with his new toys a little bit before he went down for the afternoon... he makes a "surprised" face when he pulls something new out! I'm amazed at how something so simple can make him so happy! :) 

Share/Save/Bookmark

Thursday, July 16, 2009

Easy Quiet Book


I LOVE making these quiet books! They are sooo much easier than trying to design my own (see "My ABC Book" post). This little fabric book took me only two of my son's naptimes... so about 3 hours in all! All of these fabric book panels come with instructions, which makes it even easier to put together!

My mom gave me this panel of book fabric for Mother's Day, and I love it because it talks about where food comes from. 

I also love it because they visit a farm and learn how things grow into the foods that we eat. 

In the story, it's Grandpa and Grandma's farm... wouldn't that be cool if all grandparents ran a farm? Mmmm... farm fresh food all the time! :)

Page 8 is my favorite... I think it looks like me... brown hair, and baking everything in sight! :)

My son will just have to be satisfied with our backyard garden, and the occasional trip to a Farmer's Market...

This book was written and illustrated by S.K. Johnson, and designed by Possibilities for Avlyn.

So, here's what you need:

1 book panel
1 yard medium-weight nonwoven interfacing 22" wide OR
24 x 36" thin batting
General sewing supplies

Here's how to make it (these are the instructions that came with the panel):

1. Cut out the six 2-page units along the outer edges
Cut interfacing or batting the same size as the book cover. 
Baste (or iron) interfacing or batting to the wrong side of the book cover. 

2. Pin unit for pages 1/10 to book cover with right sides together. Make sure tops of pages are facing. Baste. 

3. Stitch with 1/4" seam allowance, leaving an opening for turning. 

4. Clip corners. Turn right side out. Press. Turn in seam allowance at opening and slipstitch closed. 

5. Repeat steps 1-4 with unit for pages 9/2 and unit for pages 3/8 placed right sides together. Repeat with unit for pages 7/4 and unit for pages 5/6 placed right sides together.

6. Place book cover open on flat surface with pages 1/10 facing up. 

7. Centering smaller pages on larger ones, place page 2 face down on page 1, page 4 face down on page 3. Check sequence of pages. Pages 5/6 will be facing up. 

8. Machine stitch on center line, backstitching at each end to secure pages.  

Share/Save/Bookmark