Showing posts with label Recipes. Show all posts

Friday, December 27, 2013

Taking a breath!

Well, December certainly was a busy month! Now I need a good long break from the hustle and bustle. I hope you all had a wonderful Christmas with your families. Sorry I haven't posted recently. I haven't had time for much since before Halloween! I made handmade gifts for all the adults in my family, but I didn't get a chance to take pictures of all of them. I always forget that part. Here are some of the things I did get pics of...


I made "scarves for my sisters", using my precious leftovers of Anna Maria Horner flannels and voiles from my giant log cabin quilt. These went to my sister, my two step-sisters, and my two sisters-in-law. 

I made remote caddy pillows for 3 of my brothers-in-law. Just pillows with pockets, handy for remotes, iPhones, or snacks. ;) Sorry, no pics. 


I finished this crossword quilt for my brother-in-law, who was requesting a quilt. Really, my sister was requesting a quilt for him, since he kept stealing the one I made for her. :) For the "answers" I used his name, and names of his family, as well as some other things. I embroidered all of the letters, and I also embroidered a couple of pharmacy related items (mortar and pestle, and pill bottle), since he's a pharmacist. I used a couple of charm packs of Kona Cotton in the Silent Film palette, as well as some white and red. Some of my favorite colors together. 


I used some Kona Cotton in Ash for the back, as well as some leftovers of charm squares from the front. 


Here's a close-up of the pill bottle. 

I also made a bike lunch bag for my step-dad, and some heart quilted coasters and hot pads for my mom. Again, no pics of these. Don't know what I was thinking... 


The hubs surprised me with an old Singer sewing machine. I think it's from the 1920's or something. Supposedly, it runs, but I haven't tried it yet. Right now, it's just a gorgeous decoration for my dining sewing room. :) We also just celebrated our 10th Anniversary this month! Told ya it was busy... 


Of course, I've also been busy keeping the kids occupied. I love when my son is out of school! I usually get an extra half hour to sleep in, and we get lots more time to play. We had to make some cookies for Santa, and my son had his heart set on gingerbread cookies. It was my first time making them, and they turned out pretty good. Really soft too! Of course, we loaded them up with sugar so Santa could go into a diabetic coma! 

Here's the recipe I used, in case you want to try it:

Ingredients:
2/3 cup light brown sugar, packed
2/3 cup molasses
2 tsp ground cinnamon
2 tsp ground ginger
2 tsp baking soda
1 cup unsalted butter, room temp
1 large egg, beaten
2 tsp vanilla extract
1/2 tsp salt
4 cups flour, plus extra for dusting

Preheat oven to 325F. 

Place brown sugar, molasses, cinnamon, and ginger in a large saucepan over medium low heat. Bring to a boil, stirring frequently. Remove from heat and stir in baking soda.

Stir in butter gradually, stirring well between additions to combine. Add egg, vanilla, and salt to sugar mixtrure, stirring to combine. Pour into a large bowl and add flour gradually, stirring to combine.

Turn dough out onto a lightly floured work surface and knead until dough comes together and is no longer sticky, adding flour by the tablespoon if necessary.

Roll out half the dough on a floured work surface to 1/8-inch thick. Cut dough into desired shapes. Place on prepared baking sheet and bake until edges are slightly browned, about 10 minutes. Remove from oven. Let cookies cool on baking sheet for 5 minutes. Transfer to a wire rack to cool completely before decorating. 

*Note: I halved the recipe, and I made my cookies a little thicker, probably closer to 1/4" thick. They were great! 

Hope you all have a wonderfully Happy New Year! Wow... 2014! Time flies!


Share/Save/Bookmark

Monday, August 1, 2011

Lemon-Blueberry Muffins


Wow! It's been a while since I've posted a recipe on here. But, these muffins are definitely worth mentioning. I actually found a recipe online for lemon-blueberry bread, modified it a little bit (as usual), and made these delicious muffins! Lemon and any kind of berry make a really delicious combination, in my opinion, and everyone loves blueberries, right? Anyways, here's my modified recipe: 

Lemon-Blueberry Muffins

Ingredients:

1/3 cup melted butter, cooled to room temp
1 cup sugar
3 tbsp lemon juice (about 2 lemons)
2 eggs
1-1/2 cups all-purpose flour (I used whole-wheat flour)
1 tsp baking powder
1 tsp salt
1/2 cup sour cream
2 tbsp grated lemon zest
1 cup fresh or frozen blueberries

Directions:

Preheat oven to 350 degrees F. Grease and flour a muffin tin, or line with paper cups.

In a mixer, beat together butter, sugar, lemon juice, eggs, and sour cream. In a separate bowl, combine flour, baking powder, and salt. Gradually add dry ingredients to the egg mixture until combined. Fold in lemon zest and blueberries. Pour batter into prepared muffin tin. 

Bake in preheated oven for 30-35 minutes, or until a toothpick inserted into center of muffins comes out clean. Cool in pan for 10 minutes. Remove and cool on racks completely... or enjoy hot! Yum! :)


Share/Save/Bookmark

Friday, September 18, 2009

Chicken and Roasted Tomatoes

I guess I'm having a "food" week... I've been posting mostly recipes this week! :) This dinner was inspired by a half-dozen tomatoes that I didn't know what to do with. My father-in-law is always bringing us food when he comes to visit us, and most of the time he brings too much! It is very sweet of him, I know. But, this week I had six tomatoes, and no idea what to do with them... as they were continuing to ripen on my counter. There wasn't quite enough tomatoes for a soup, plus I didn't have tomato paste. So, I searched online and found a delicious recipe from Ina Garten from Food Network. Mmmm... roasted tomatoes. My hubby was a little annoyed that the roasting was a little "smoky" from the oil, etc. But, they tasted so good, so I think he forgave me. ;) I was actually thinking of making a chicken cacciatore, but most of the recipes I found called for a big can of tomatoes, and that just wasn't going to work for me... So, after I borrowed Ina's roasted tomato recipe, I did my own thing with them. The tomatoes are so good just by themselves. Roasting them with the oil, balsamic vinegar and garlic really gives them a whole new flavor, and they were delicious mixed with the chicken and pasta. This meal is actually two recipes, combined later. You can serve the chicken and tomatoes over pasta or rice, or just eat them plain! Ina's recipe called for 12 tomatoes, but since I just had 6, I halved the recipe. Enjoy!

Serves 2 to 3


Ingredients:

6 plum tomatoes, halved lengthwise, cores and seeds removed
2 tbsp good olive oil
3/4 tbsp balsamic vinegar
1 clove garlic, minced
1 tsp sugar
3/4 tsp salt
1/4 tsp freshly ground black pepper

Preheat oven to 450 F.

Arrange the tomatoes on a sheet pan, cut sides up, in a single layer. Drizzle with olive oil and balsamic vinegar. Sprinkle the garlic, sugar, salt, and pepper over the tomatoes. Roast for 25 to 30 minutes, until the tomatoes are concentrated and beginning to caramelize. Serve warm or at room temperature.

*Note: I didn't roast my tomatoes all the way, since I knew I was going to be cooking them further along with the chicken. But, they were still delicious!

My Easy Chicken Recipe with the addition of Ina's tomatoes:

Ingredients:

2 boneless, skinless chicken breasts
1 tbsp olive oil
1/4 tsp dried Italian seasoning
2 cloves garlic, minced
1 tbsp low-sodium chicken broth
Salt and pepper to taste

Heat oil in non-stick skillet over medium-high heat. Sprinkle chicken with salt and pepper on both sides. Cook chicken in skillet for 3 to 4 minutes per side. Place chicken on a separate plate. Return skillet to heat, add garlic and cook for 1 minute, or until slightly browned. In the meantime, cut chicken and roasted tomatoes into big chunks or cubes. Return chicken to skillet, cooking until no longer pink. Add broth, Italian seasoning, and tomatoes, and cook another 1 to 2 minutes or until all flavors are combined.


Share/Save/Bookmark

Wednesday, September 16, 2009

Chicken Salad Mini Pitas... Makeover

So, I made some Chicken Salad for my son a while back, and I wanted to do something different this time. I got some ideas online, but ended up doing my own thing. I think it tasted better than my first recipe. My son enjoyed it too! Things I like about this recipe: I really like using the mini pitas because they're the perfect size for his little hands! I like that when the chicken salad is put with some kind of bread, pasta, or grain, it makes a complete, well-rounded meal. You have grain, protein, veggies, and fruit in this recipe! I also like that it is relatively easy to make since you put most of the ingredients in the food processor. If you are used to a chunkier chicken salad, you don't have to use the food processor. You can just chop up your ingredients to the size you prefer, or only pulse a couple of times using the food processor. :) 

Ooh! I almost forgot... I also mixed some of this salad with some pasta and my son loved it that way too! 
Enjoy! 

Makes about 2 cups 

Ingredients:
1 boneless, skinless chicken breast
1 apple, peeled and cored
1/2 cup celery
1 carrot, shredded
1-1/2 tbsp mayo
1/4 tsp poultry seasoning*
1/8 tsp freshly grated nutmeg*
1/8 tsp garlic powder*
1/8 tsp onion powder*
1 tbsp orange juice (lemon juice would be good here too)
Salt and pepper to taste

Cook chicken breast as desired. I put mine in a steamer basket over a pot of boiling water and I sprinkled it with the dried spices. Once chicken is cooked, let it cool, then chop it. Also chop apple and celery. Add all ingredients to a food processor and pulse until you achieve your desired consistency. Cool salad in the fridge until ready to serve. You can also serve this warm. You can serve this as a sandwich, in pitas, as a wrap, or mixed with pasta or rice. 

*Note about spices: You can use any spices you like, or none at all and it will still taste good. I don't really measure my spices when I add them, so the measurements listed are approximate. I usually just do a sprinkle or a pinch here and there, until I think it tastes good. ;) 

Share/Save/Bookmark

Tuesday, September 15, 2009

Corniest Corn Muffins

Well, this recipe is not mine, but I wish it was! These corn muffins turned out delicious! I took them to a potluck and got a few compliments on them, so I thought they were blog-worthy. :) I have to say "Thank You!" to my friend who took this pic! I totally forgot to take a picture of my food! Anyways, I love that these corn muffins are the perfect amount of sweetness, with pieces of corn mixed in. My husband is a corn fanatic, so he wanted to gobble all of these up right away... I had to limit him to 2 muffins since we were taking them to a party (where he ate even more of them!). These would go great with some yummy barbeque or a hot bowl of chili! I changed up the recipe just a little bit... anytime I see a baking recipe that calls for flour, I substitute half of the all-purpose flour with whole wheat flour to make things a little healthier. :) I found this recipe online... it's from Dorie Greenspan's book, Baking from My Home to Yours:
 
Makes 12 muffins, or 48 mini-muffins

Ingredients:
1/2 cup all-purpose flour
1/2 cup whole wheat flour
1 cup yellow cornmeal, preferably stone-ground
6 tbsp granulated sugar
2-1/2 tsp baking powder
1/4 tsp baking soda
1/2 tsp salt
Pinch of freshly grated nutmeg (optional)
1 cup buttermilk
3 tbsp unsalted butter, melted and cooled
3 tbsp corn oil (I used canola)
1 large egg
1 large egg yolk
1 cup corn kernels (add up to 1/3 cup more if you like), fresh, frozen, or canned (drained and patted dry)

Center a rack in the oven and preheat the oven to 400 F. Butter or spray a 12-cup muffin tin, or line with paper cups. 

In a large bowl, whisk together the dry ingredients and set aside. In another bowl, whisk together the buttermilk, melted butter, oil, egg and yolk together until well blended. Pour the liquid ingredients over the dry ingredients. With a whisk or rubber spatula, gently but quickly stir to blend. The batter will be lumpy. Stir in the corn kernels. Divide the batter evenly among the muffin cups. 

Bake for 15 to 18 minutes (or 12 minutes for mini-muffins), or until the tops are golden and a thin knife inserted into the center of the muffins comes out clean. Transfer the muffin tin to a rack and cool for 5 minutes. Remove muffins from the tin, and serve hot, or cool completely to serve later. :) Enjoy! 


Share/Save/Bookmark

Thursday, September 10, 2009

Easy Bean Salad

So, I'm sure all you bloggy friends that follow me and my recipes will get sick of hearing me say this, but here it goes again... The other day I was trying to create something that I knew my son would eat... but, it had to have some protein and veggies mixed in it somehow. Well, earlier this summer, we had gone to a little sandwich shop, and they had a bean salad served along with their sandwiches. My son absolutely loved it! So, I knew I had to try and create something similar. Well, I don't know what they put in theirs, but I think they had tomatoes, and some other veggies mixed with Cannellini beans and a simple dressing. I was unable to completely recreate their recipe, but this one was super quick and easy to make. The best part was... both my son and my husband loved it! :) I think next time I'll try making my own dressing, and maybe adding cilantro and tomatoes. Yum!

Ingredients:
1 can Cannellini beans (white beans), drained, rinsed and dried
1 carrot, shredded
1 zucchini, shredded
2 tbsp Italian dressing (or to taste)
Pepper to taste

In a medium bowl, combine all ingredients and stir to combine. Serve and enjoy, or refrigerate and serve later! :)


Share/Save/Bookmark

Thursday, September 3, 2009

Thank you, Julia and lululu!

So, the other day, I was catching up on my comment love, and was visiting lululu's lovely blog when I saw that she had posted Julia Child's recipe for Boeuf Bourguignon. Well, I have no way of knowing if it's really her recipe or not, since I don't own Julia's book yet, so I just took lululu's word for it. ;) Nevertheless, I was excited to see the recipe, having recently seen the movie Julie & Julia. Of course, the meal looked delicious in the movie, so I really wanted to try it! So, try it I did, and it is a delicious recipe! I think this may have been one of the best meals I've ever made! Either that or I was really hungry after taking the time to make this. I won't lie... it takes a long time to prepare... but, the directions are easy to follow, and it is so worth it! My husband loved it too, and he even had a stuffy nose that night! So, since I didn't come up with this recipe, I'm sending you over to lululu's blog to check it out. I only added one thing extra to this... a few leaves of fresh sage, finely chopped, in addition to the other herbs. Probably my three favorite herbs for turkey, chicken or beef are thyme, rosemary and sage... and I love using them together! Plus, they're readily available in my backyard garden! :) I served the beef over some homemade garlic mashed potatoes. Sorry, no recipe for these either, I just added some milk, sour cream, garlic and salt to the flavor and consistency that I wanted. 

Enjoy!


Share/Save/Bookmark

Wednesday, August 19, 2009

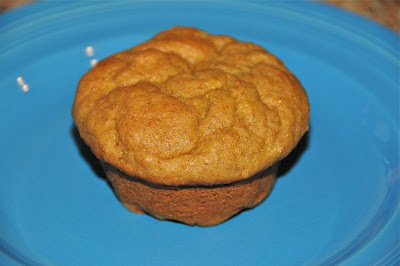
Pumpkin-Banana Muffins

Here it is... as promised! :) I made these muffins on Sunday, and was pleasantly surprised how well they turned out. I get a little nervous when I'm trying new things (and winging it) when it comes to anything baked. I've had mistakes a couple of times... muffins come out looking good, then deflate... But not this time! :) Basically, I just added some pumpkin puree and extra spices to my favorite Banana Muffin recipe, and prayed they would come out delicious. My husband kept calling them "Frankenstein" muffins, since they were "my own creation". When I was taking them out of the oven, he started chanting, "They're ALIVE! They're ALIVE!". :) What's funny is, I actually made some muffins a while back that are even more "Frankenstein" than these... I don't know why he didn't call those "Frankenstein" muffins..? Anyways, these muffins turned out yummy and all three of us are still enjoying them... 

This recipe makes about 12 to 18 muffins.

Ingredients:
1 pkg. (8 oz) Neufchatel Cheese, softened (cream cheese is fine too)
1 cup sugar (or 1/4 cup Agave Nectar)
1/4 cup (1/2 stick) unsalted butter, softened
1 cup mashed ripe banana (about 3 medium bananas)
3/4 cup pumpkin puree*
2 eggs
1-1/4 cup all-purpose flour
1 cup whole wheat flour
1-1/2 tsp baking powder
1/2 tsp baking soda
2 tsp pumpkin pie spice*
1/4 tsp ground cinnamon
pinch salt

Preheat oven to 350 F. Grease and flour muffin trays or use paper liners; set aside. In a stand mixer, beat neufchatel cheese, sugar and butter on medium speed until well blended. Add banana, pumpkin and eggs; mix well. 

In a separate bowl, whisk together dry ingredients. Add combined dry ingredients to mixer; mix until moistened. Pour into prepared muffin cups until 2/3 filled. Bake 30 to 35 minutes or until a toothpick inserted in centers comes out clean. Cool in trays for 5 minutes; remove muffins and cool completely on wire racks... or serve steaming hot because your family can't wait to eat them! ;) 

*Note: For the pumpkin puree--canned pumpkin is okay, but NOT pumpkin pie filling. If you don't have pumpkin pie spice on hand, click here for a recipe to make your own. Also, for a boost of Omega-3, you can add 2 tbsp flaxseed meal to this recipe! Just mix it in along with the dry ingredients before you add it to the rest of the batter. :)

Enjoy!


Share/Save/Bookmark

Friday, August 14, 2009

Savory Sweet Potatoes

Hey everyone! This is a re-post from before I had followers. I figured this would be easiest since I am not feeling well. Sorry. Hoping to be back to normal soon. Enjoy!


My family LOVES sweet potatoes! I found a recipe for roasted root veggies in my Cooking For Baby cookbook (see April 2nd post), but I do it a little different. Sometimes I add carrots to my mix, but since my son (and husband) love the sweet potatoes, I usually only use them. It is a very simple recipe and very yummy! And when they're done (and cooled down), they make a great finger food for your toddler (or a practice "fork-stabbing" food), or a side dish for the family! We love the sweet, but salty/peppery taste of them!

Ingredients:
2 to 3 medium-sized sweet potatoes, peeled and cubed
1 to 2 tbsp olive oil (depending on the amount of potatoes)
1 to 2 tbsp snipped fresh rosemary, minced (thyme also works good)
salt and pepper to taste

Preheat oven to 400 F. Line a baking tray with aluminum foil and spray with non-stick spray. Place prepared potatoes on tray, and drizzle with olive oil. Sprinkle salt, pepper and herbs over potatoes. Stir potatoes so that they are evenly coated, then spread out evenly on tray. Bake at 400 F for 20 to 25 minutes, or until tender. 

Note: You can also add carrots, parsnips, white sweet potatoes, regular potatoes, or any other root vegetable to this mix. They all taste delicious! :) I've also made these with a mixture of fresh minced rosemary, sage, and thyme and they are even yummier!


Share/Save/Bookmark

Sunday, August 9, 2009

Pumpkin-Banana Pancakes

I've been craving all things "Fall" again. Hurry up, Fall! So, since I hadn't made any pancakes in a while, I decided to make some pumpkin pancakes yesterday. My son loved them, and so did I! I made a similar recipe a while back (before I had followers...), but I think this is a much better recipe. The bananas brought in some natural sweetness, and I used my own pumpkin pie spice in the mix. Again, if you are a syrup lover, these would be great topped with some maple syrup! I am not a fan... so my son and I eat them plain (although, I'm sure he would love some sugary syrup on top!). They are good either way! 

Ingredients:
3/4 cup Arrowhead Mills Multigrain Pancake Mix
1/2 cup plus 2 tbsp milk
1 tbsp canola oil
1/4 cup pumpkin puree
1 tsp pumpkin pie spice*
1 tsp agave nectar
1 banana, chopped

Heat skillet over medium-high heat and spray with non-stick spray. Mix all ingredients, except banana, in a medium bowl and stir until smooth. Fold in banana chunks until evenly distributed. Pour batter in skillet to make 4 or 5-inch rounds. Flip pancakes when bubbles start to form on top, then cook for another minute or so. Serve and enjoy!

*Note: If you are like me, and don't normally have store-bought pumpkin pie spice on hand, Click Here for a recipe to make your own pumpkin pie spice. 


Share/Save/Bookmark

Friday, July 31, 2009

Soft Taco Night...

So, my husband was craving some tacos, and since we had just bought some tortillas, he apparently felt the need to use them all up right away... I actually wanted them to make some quesadillas for my son. But, instead I ended up making some delicious soft tacos for dinner! I usually use a packet of taco seasoning, but I didn't have any, and I also didn't feel like going back to the grocery store in a hot car just for a small packet of seasoning. So, I made up my own "taco seasoning" and it tasted pretty good with the ground beef. It was a little bit spicy, but still yummy! :) When you have the beef mixture made, you can add any toppings you want. We had some tomatoes, green chili and shredded cheddar on hand. I also like sour cream, but we didn't have any. The beef mixture can be used in any kind of tortilla you want. Since we just had flour tortillas, we made soft tacos. But you can certainly use corn tortilla taco or tostada shells, or make your own corn tortilla tacos if you have a deep fryer. Yum! :) Enjoy!

Ingredients for beef mixture:

1 tbsp olive oil
1 lb ground beef
1 green bell pepper, diced
1/2 onion, diced
1 tbsp garlic, minced

Ingredients for taco seasoning:

2-1/2 tsp onion powder
2 tsp New Mexican chili powder
1 tsp salt
1/2 tsp pepper
1 tsp garlic powder
1 tsp cumin
1/2 tsp red pepper flake


In a small bowl, stir together all taco seasoning ingredients until combined. Set aside. In a large skillet, heat oil over medium-high heat. Add onion, garlic and bell pepper and cook until tender. Add beef and combine with the other ingredients while browning. When beef is browned, add taco seasoning mixture. You can add as much or as little as you want until it is to your preferred taste. Mix all ingredients well. Serve in a warm flour tortilla or a crunchy corn tortilla with your favorite toppings. :)


Share/Save/Bookmark

Thursday, July 23, 2009

Mac and Peas

I was having a really rough time this past week... trying to get my son to eat anything nutritious! I don't know why this happens. He has some really great weeks of eating "normal", and I think, "maybe he's changed and he's going to be a good eater from now on"... But then we have frustrating weeks like this past one where he turns down almost anything I make for him. It is frustrating, and I have no idea where he gets it from... my husband and I are both good eaters! Anyways, this week it seemed my son would only eat anything "bread" related... crescent rolls, crackers, pasta... So, I've had to be really creative this week. I made this new Mac and Cheese where I snuck in extra protein and veggies (I can't believe I'm having to resort to sneakiness!). I mixed in some tofu with the cheese sauce, then added sweet potato puree and peas. It was very successful! I tried some too... and it was delicious! This is going to be one of my new "go-to" recipes when my son is feeling picky again! Enjoy! :)

Ingredients:

2 cups small pasta (I used elbows)
1/4 cup tofu (I use firm since it has more protein)
1/2 cup milk
1-1/2 cups shredded sharp cheddar cheese
1/4 cup sweet potato puree
1/4 cup frozen peas
Dash of pepper

Cook pasta per package directions.
In a food processor or blender, puree together tofu with 1/2 cup milk until smooth. Heat tofu mixture over medium heat until warm. Slowly whisk in cheese until melted evenly, and mixture becomes smooth. Reduce heat to low. Add sweet potato puree and stir until combined. Add pasta and frozen peas. Stir until evenly coated with cheese sauce, and peas are cooked (this only takes a minute or two). Add pepper to taste. Serve and enjoy!


Share/Save/Bookmark

Saturday, July 18, 2009

Cranberry-Orange Pancakes

More Pancakes... yum! I need to get even more creative and start making some delicious syrups to go along with all these different pancake recipes! 
As I said in my mini-cranberry corn muffin post, I have been in the mood for cranberries lately. I think it is mostly because I cannot wait for fall... as usual! It is my favorite time of year with all the different colors and foods... I am already excited for Thanksgiving! 
Cranberries are usually around in the fall and winter, but you can probably find some frozen cranberries in your supermarket. I used frozen for this recipe since fresh were not available... I love orange and cranberry together! These two flavors are like butter and popcorn... they just go together! :) So, I thought some yummy cranberry-orange pancakes would be a delicious morning breakfast! As usual, my son gobbled them down... even though they weren't very sweet! :) Enjoy!

Ingredients:
3/4 cup Arrowhead Mills Multigrain Pancake Mix
1 tbsp Canola oil
1/2 cup plus 2 tbsp milk
2 tbsp orange juice*
1/2 tsp cinnamon
1 tsp agave nectar
1 tbsp flaxseed meal
1/2 cup fresh or frozen cranberries, thawed, rinsed, and chopped*

Heat a nonstick skillet or griddle over medium-high heat and coat with nonstick spray. In a medium bowl, combine all ingredients except cranberries. Stir well until moistened and smooth. Gently fold in cranberries until evenly distributed throughout the batter. Pour batter into round circles on skillet, and cook until bubbles begin to form on the top and edges begin to firm up. Flip and cook for another 1-2 minutes. Serve plain or with hot maple syrup! 

*Note: If you have fresh oranges on hand, you can use fresh squeezed orange juice and some orange zest for more orangey flavor and fragrance! I chopped the cranberries since I was serving these to my toddler son. I figured the whole cranberries would be a little too big for him. You are more than welcome to use whole cranberries if you desire! Dried cranberries would probably be fine in this recipe too! :)


Share/Save/Bookmark

Wednesday, July 15, 2009

Different Chicken Noodle


When my son is feeling under the weather, I make him some homemade chicken noodle soup. It is such a healing natural remedy for colds, and I think it just makes you feel better by keeping your insides warm! Normally I like to use the typical onion, celery, and carrots, but I didn't have any celery on hand. So, I decided to make my own version using ingredients that I had. You can really use any kind of vegetables you like, and I'm sure it will taste delicious no matter what. I usually steam the chicken and vegetables first to soften them before I stick them in the broth with the noodles. When my son was younger, I would puree the chicken and vegetable mixture with a little bit of broth, then use it as a sauce over small pasta (elbows, wheels). It makes a great finger food! Nowadays, he is becoming more independent and likes to feed himself, so I just give it to him the same way we eat it! It is so much healthier this way without all the added sodium and preservatives that the canned versions have. The best part is my son LOVES it! :) Enjoy! 

Ingredients:
1 boneless, skinless chicken breast, cubed and cooked
6 oz whole wheat egg noodles
1 cup chopped broccoli florets, cooked
1 cup chopped carrots, cooked
1/2 cup chopped onion
1/2 cup chopped sun-dried tomatoes
1 tbsp minced garlic
3 cups water
3 cups low-sodium vegetable or chicken broth
Salt and pepper to taste
1/4 tsp cumin
1 tsp poultry seasoning

In a large pot, bring water and broth to a boil. Add pasta, and cook until al dente, about 7 minutes. Add remaining ingredients, stir, and simmer for another 1 to 2 minutes, or until heated through, tender, and the flavors are combined. Serve hot, or at room temperature for toddlers. Makes about 6 cups. 

Share/Save/Bookmark

Thursday, July 9, 2009

Mini Cranberry Corn Muffins


Can you tell I'm getting excited for fall already?! I LOVE cranberries! I usually get a lot of them when Thanksgiving rolls around, but frozen are usually available all year. I hadn't made any muffins in a while, so I thought I'd make some corn muffins this time. And instead of blueberries and lemon, I used cranberries and orange. I love those flavors together! I recently got a mini-muffin tray for my birthday, and I was so excited to use it. As much as my son loves any form of bread... especially muffins, I thought it would be great to make him some "easy to eat" muffins. I normally have to break pieces of muffin apart for him, otherwise he tends to try to cram the whole regular-sized muffin in his mouth, and nearly chokes! These mini muffins are perfectly sized for little hands, and little mouths! :) This recipe is not very sweet. Cranberries are very tart, so if you want them a little sweeter, you could either coat them with some extra sugar before adding them to the mix, or use dried sweetened cranberries. I think these taste great as is, and my son agrees! :)

Ingredients:
1/2 cup all-purpose flour
1/2 cup whole wheat flour
3/4 cup yellow corn meal
1/4 cup sugar
1-1/2 tsp baking powder
1/2 tsp baking soda
1/2 tsp salt
1/4 cup unsalted butter, melted and cooled
1 large egg
3/4 cup milk
2 tbsp orange juice
1 tbsp orange zest
1 cup fresh or frozen cranberries, chopped, and rinsed and drained if frozen

Preheat oven to 425 F. Spray a mini muffin tray* with nonstick spray. Set aside.

In a large bowl, mix all dry ingredients together. Set aside 1/4 cup of the dry ingredients in a small bowl. In a separate medium bowl, combine all wet ingredients except cranberries, making sure the melted butter has cooled. Add wet ingredients to dry, and stir until just combined, don't over-mix. Coat the cranberries with the remaining 1/4 dry ingredients before adding to the batter. Gently fold the cranberries into the batter.

Scoop the batter into the muffin cups until about 2/3 full. Bake at 425 F for 12 to 14 minutes (*or 20 to 25 minutes for a regular 12-cup muffin tray). Cool tray on a wire rack for 5 minutes. Remove muffins from tray, and cool completely on a wire rack. Serve and enjoy! 
Makes about 24 mini-muffins, or 12 regular sized muffins. 

Share/Save/Bookmark

Wednesday, July 8, 2009

Miso Soup

My son LOVES Miso soup! Anytime we go to a sushi restaurant, the waitress brings out a little bowl for him, with some added rice. He usually finishes it, which makes me happy. It's another way for him to get some extra protein, and iron. :) So, I know it's not soup season, but I was dying to try to make my own miso soup. I got some of the ingredients at an Asian supermarket, and some at Whole Foods. Since I knew my son loved the seaweed and tofu in the soup at the sushi restaurant, I bought some to add to the soup here. Also, when I got the container of miso, I noticed that there was a simple recipe on top (just miso and water), which made it a little easier. However, I didn't use their guidelines. It needed more miso, and more yummy ingredients in my opinion... So, here's what I came up with, and it tasted so good! I made 2 cups worth of soup, and he ate at least 1 cup... probably more. 
He loved it, as expected, and I was so happy! :)

Ingredients:
2 cups water
5 tsp light yellow miso
1 handful of Nori, shredded (or Kombu)
1 tbsp Bonito flakes
2 tbsp dried Shiitake mushrooms
2 green onions, chopped
1/2 cup tofu, cubed
1/2 cup rice, pre-cooked

In a medium pot, stir together miso and water, and bring to a boil. Remove from heat. Reduce heat to low, and return pot to burner. Add the remaining ingredients, and cook until heated and mushrooms are tender. Serve and enjoy! Or, if serving to little ones, cool to room temperature before serving. This is probably about 4 servings, but with my son, it only ended up being 2 servings! 

Share/Save/Bookmark

Tuesday, July 7, 2009

Greek Pasta Salad

I have been making this pasta salad at least once a year for the past 10 years or so. The first time I made it, I used a recipe from one of my mom's cookbooks. Then, the cookbook somehow got lost or otherwise vanished... I have never been able to find it again. But, since that first time I made it, I LOVED this salad! And everyone else loved it too! So, I've been "winging" it for the past 9 or 10 years... I remember some of what was in it, but I've never really measured the dressing. I just grab handfuls of this and that, mix it up and taste to see if it's right. So, I apologize for some of the non-measured ingredients. This is how I've been doing it for a long time. It works, and it ends up tasting delicious! My son even loves it! This is a great summer time salad, or any time potluck salad, with yummy fresh and light ingredients! 
And it's very colorful! :) Enjoy!

Ingredients:
Salad
1 pkg. (12 oz) tri-color rotini, cooked per package directions
1 red bell pepper, sliced in thin strips
1 green bell pepper, sliced in thin strips
1 yellow bell pepper, sliced in thin strips
1 pkg. grape tomatoes
1/2 cup Calamata olives, pitted and halved*
1 pkg. (4 oz) Feta cheese, crumbled

Dressing
1/4 cup olive oil
1/4 cup white vinegar
About 12 fresh basil leaves*
About 6 big fresh sage leaves, chopped*
About 1 tbsp fresh thyme leaves*
Big handful of fresh Italian Flat-leaf Parsley*
1 bunch green onions, chopped
1 tbsp garlic, minced*
1/2 tsp salt
8 to 10 turns fresh ground black pepper
1 to 2 palmfuls parmesan cheese, grated

Putting it all together
In a large serving bowl, combine pasta, bell peppers, tomatoes, and olives. Set aside. In a food processor, combine all dressing ingredients and puree until smooth. I always taste it to see if it needs anything else. Some things I occasionally have to add are: more pepper or parmesan cheese. Once you have your desired taste, pour dressing over pasta mixture, and gently stir to coat the pasta with the dressing. I think it is much easier to use clean hands here. Add feta cheese and gently stir it into the pasta. Refrigerate before serving. It tastes really good if you refrigerate it overnight. I think more of the flavor gets absorbed in the pasta or something... yum! :)

*Note: Green olives would be fine here too. I think they taste about the same. The Calamata olives are a little bit more tangy (?), vinegary (?), which goes well with this salad! You can also use crushed dried herbs if you don't have fresh on hand. Use 1/3 dried herbs per 1 part fresh herbs. So, 1 tbsp fresh basil=1 tsp dried basil. Since I don't really measure my fresh herbs, if I were to use dried herbs, I would start with about 1 tsp of each and go from there... If it tastes good, leave it... If it needs some flavor, add more. And if you're using dried herbs, crush them in your hand a little before you add them to your dressing. This helps release more of the flavor. :)

Share/Save/Bookmark

Sunday, July 5, 2009

"Barbeque Chicken Buns"


So, in my previous crescent roll recipe, I had said that I would try to make my own barbeque pork buns. Well, this is sort of my take on that, with some slight differences. I took the meat idea, and used chicken instead, since I didn't have shredded or diced pork in my fridge. I also used my Better BBQ Sauce recipe which I had frozen into ice cube trays... and I must say, it freezes and defrosts very nicely! So, besides the chicken that I had to cook, I basically had most of the ingredients (rolls and BBQ sauce) already prepared, so this was a very easy recipe for me to put together. But, I realize that if you are going to try to make my version of barbeque sauce, then there is a little bit more work involved for you. :) Otherwise, to make it easier (and faster), you can certainly use the store-bought barbeque sauce and you'll have these "buns" prepared in no time! In case you missed the BBQ Sauce post, here's a little background info on my barbeque sauce: My son LOVES barbeque sauce, and I know that if I drench his meats in it, he will definitely eat more protein! However, my problem with store-bought barbeque sauce is that they are loaded with sugar! Obviously, this is the reason why my son likes it so much! So, I tried to make a healthier version for him. We both think it tastes pretty good, and I snuck in some veggies too! :) Needless to say, my son LOVED these barbeque buns! Yay! Enjoy!

Ingredients: 
1 boneless, skinless chicken breast, cooked and shredded
1/2 cup Better BBQ Sauce (recipe below)
1 tube refrigerated crescent rolls (I used the Pillsbury Big and Flaky)

Preheat oven to 350 F. Combine barbeque sauce and chicken and stir until sauce is evenly distributed throughout the chicken. Unroll and separate crescent rolls onto a baking sheet. Place about 2 tbsp of meat mixture onto each crescent roll, and spread all along the inside of the roll. Starting at the wide end, roll up the crescent all the way to the tip, making sure meat stays in place. Curl the two ends of the roll to make the crescent shape, and lay on the baking sheet. Space rolls about 2 inches apart from each other on the baking sheet. Bake at 350 F for about 15 to 19 minutes, or until golden-brown. Makes 6 to 8 rolls. 


Better BBQ Sauce
Ingredients:
1/2 cup vegetable broth
1/2 cup sweet potato puree
1/2 cup carrot puree
1/2 cup cider vinegar
3/4 cup tomato paste
1/4 tsp salt
1/4 tsp garlic powder
2 tbsp Worcestershire sauce
1 tbsp molasses
1 tbsp agave nectar
2 shakes Tabasco
pepper to taste

Mix all ingredients in medium saucepan over low heat, until combined and heated through. Makes about 2 cups. Extra sauce freezes nicely. Enjoy!

Share/Save/Bookmark

Saturday, July 4, 2009

Red, White, and Blue Trifle

Happy 4th of July, everyone! Well, I suppose this is almost exactly the same as my Berry Trifle recipe, except that I used raspberries instead of blackberries, and I remembered to add bananas this time! I also did my "fruit sauce drizzle" a little differently. I love making this trifle for the 4th of July since it looks very patriotic, and the berries are usually at their best this time of year! It is so delicious! :) 
Enjoy, and have a great day!

Here's the recipe, in case you missed my Berry Trifle post:

Ingredients:
1 pound cake, cubed
1 package (3.4 oz) banana pudding mix
2 cups cold milk
1 tub whipped cream (8 oz; or make your own)
1 pound (16 oz) fresh strawberries, sliced and/or chopped
about 6 oz fresh blueberries 
about 6 oz fresh raspberries
1 to 2 medium bananas, sliced and/or chopped
3 tbsp raspberry preserves (preferably seedless)
1 lemon, zest and juice
1/2 juice of an orange (or about 2 tbsp)

To make "fruit sauce drizzle": Mix raspberry preserves with zest and juice of 1 lemon, and the juice of 1/2 an orange. I use a mini whisk, but you can use a fork too. Mix until the sauce is relatively smooth. 

To make banana pudding: Mix milk with banana pudding mix. Stir with a wire whisk for a couple of minutes. Let the pudding mixture set while you're preparing fruit. 

Putting it all together: Place half of the pound cake cubes on the bottom of your trifle bowl. Drizzle with half of the "fruit sauce". Pour about 1/2 of the pudding over the cake, and spread evenly. Arrange about 1/3 of the fruit pieces evenly over the pudding. I like to make a little pattern of fruit around the bowl, so some fruit pieces are peeking through. It makes it look really pretty! Spread about 1/2 of the whipped cream over the fruit evenly. Repeat layers once. On the top layer of whipped cream, arrange some pieces of fruit in a pretty pattern, or just arrange pieces evenly over the top. This dessert tastes great when it is left in the fridge for a few hours before serving. It allows all the flavors of the fruits to soak into the cake... Mmmm! 

Share/Save/Bookmark

Friday, July 3, 2009

Red, White, and Blue Popsicles

This is my attempt to be patriotic this July 4th... I pictured these turning out a little differently than they actually did... They look more like "pink, yellow and purple" popsicles! Oh, well! It's close enough, right? 

Anyways, I thought it would be easy to make these popsicles... Boy, was I wrong! My thought was that I could just freeze strawberry, banana and blueberry purees in my popsicle molds. But then I knew I had to do each one separately so the colors wouldn't mix. So, that's what I started to do. I started with the "red" because I knew it had to be on the bottom of the mold so that it would be on top once it was frozen. I figured strawberry puree would be red enough, but it wasn't. That was my first disappointment. Maybe next time I'll add some beets... Then I was thinking, what do I need to do to make the white "whiter"? I used bananas, but then figured they would probably brown a little bit, so I added some lemon juice. But it still wasn't the exact color I was going for, so I added some vanilla yogurt. That looked better. Once the "red" was frozen, I added the "white" (banana mix) on top, then put them back in the freezer. Well, then I get to the blueberries, and I should have known that they aren't actually a true "blue" color! Hmmm... purple... How do I fix that?! Well, there was no fixing it, so that was disappointment number two... So, once the "white" was frozen, I proceeded to get the molds out of the freezer and add the "blue" on top. Ok, good... Yay! I'm almost done! So, I go to put the "stick" part of the popsicle molds in... Well, aren't I a big dork?! Duh! Since the bananas and strawberries underneath the blueberries are already frozen, the stick won't go in!! Well, my bright idea was shot! So here's how the picture above ended up working... I have two different sets of popsicle molds, and let's just say that one is "cheaper" than the other. So, those sticks would only enter the frozen fruit over their dead (broken) bodies! Luckily, I found this other set of popsicle molds with stronger sticks! They pushed their way through the frozen fruit with no problem! I'm hoping they stay attached to the frozen fruit once people start eating them... 

So, long story short... instead of 8 beautiful red, white and blue popsicles... I have 4 beautiful pink, yellow and purple ones! Happy 4th of July! Enjoy! :)

Ingredients:
1 cup strawberries, pureed
2 bananas, pureed
1 cup blueberries, pureed
1/4 cup vanilla yogurt

Follow my silly "directions" above, or find an easier way to make these... Then let me know how you did it! :) Good luck! 

*Note: If you want to make this a little sweeter, you can either add a little agave nectar (maybe 1/2 to 1 tsp per puree), or mix each puree with vanilla yogurt... this will make the colors lighter, but since it's already pink, yellow and purple, it probably won't matter. ;)

Share/Save/Bookmark